Thursday, May 29, 2014

Steampunk Perpetual Calendar


You will need:

Smoothfoam: one 12" Scrapbook Mount
12" Scrapbook Tablet: Tim Holz, "Destination" paper stash
12" cardstock:  one Slate, one Dark Brown
Decou-Page medium: Matt by Deco Art
Metallic Waxes:  Black and Copper by Deco Art; rag scraps for application
Craft Glue
Pigment Ink Pad, Black
Embellishments: 1-1/4" filigree butterflies, 1-1/2" filigree squares, 1" metal washers, brass paper fasteners,
                          1" h x 3" w doll eyeglasses, paper roses: 3/4", 1-1/4"
Tissue Paper:  matte gold, metallic gold
19 gauge wire, two pieces bent into 1/2" u -pins
2 tacks with a hook: used patented clear and round CraZy TACKz  (see link in credits below)
Artiste Cricut Cartridge by Close To My Heart (die-cut gears)  (see link in credits below)
PDF's:  (attached) Calendar Elements, Pattern for Wings, Gears

Tools: 
Cricut Die-cut machine
Paper Trimmers
Scissors
Paintbrush
Wire Cutters


1.  Wad the tissue into a ball.  Unfold and flatten out.  Apply Decoupage medium to the Smoothfoam,                 following manufacturer's instructions.  Tear tissue into large pieces; adhere to the entire surface.  Tear             large strips of the metallic gold tissue.  Adhere, leaving wrinkles in the tissue paper.  Allow to dry                   thoroughly, preferably overnight.

2.  Apply copper wax randomly to the textured surface, allowing the gold to show through in spots.  Repeat      with the black shimmer wax.  Apply the Shimmer Wax to the paper wings and to the filigree elements.


3.  Cut ephemera clocks from the Tim Holz papers.  The cardstock gears were die-cut.  A PDF file is                attached if these must be cut out by hand.  The larger gears are important for the over-all design.  The 1-      1/2" die-cut gears could probably be replaced by something purchased that will work the same.  There          are 22+ of the smaller gears that are adhered to the perpetual calendar pages.

4.  Chalk the edges of the ephemera and die-cuts with the Black pigment ink pad.

5.  Arrange and adhere ephemera to the textured Smoothfoam.

For the Calendar:

1.  Background:  Cut one 6-1/2" square and one 6" square from patterned cardstock.  Adhere the smaller          square to the larger square.  Center and adhere to the board.

2.  Months:  Cut twelve 1" x 2" rectangles.  Print out the attached PDF containing the months and dates.            Center and adhere "January" to the background paper.  Repeat with February and adhere to the                    backside of the January card.  Repeat for each month.

3.  Days:  Cut 22 2-1/2" x 3" rectangles.  Cut and adhere the days as for the Months, using the front and the      back of each card.

4.  To hang the cards:  Center and glue the bottom half of a 1-1/2" gear to the front of the January card.              Repeat; gluing one gear to the front of each card.

 To finish:
*  Cut the fasteners off of the brass paper fasteners and glue the round piece to the corners of the                     calendar as shown.  Repeat the process with two more brads only adhere one to the center of the 2 large     gears.
*  Center and glue the CraZy TACKz to the calendar.  Hang the perpetual calendar cards on the hooks.
*  Center the eyeglasses above the calendar cards.  Make 2 pilot holes for the wire u-pins.  Secure the             eyeglasses to the board.
*  Display on an easel or glue a saw-tooth hanger to the back.


You can add a couple more panels to the calendar for a larger piece of wall decor.  These last two photographs show an example of some Steampunk paper sculptured angels I made last year.  I make them in ornament size (6") as well as the taller ones as shown here.  Hope you have enjoyed the project!

Visit the Smoothfoam Blog (link) for lots more ideas using Smoothfoam products.

Live Life with a Flourish!

Marilyn

PDF Patterns for gears and wings (link)

Product Credits:
*Smoothfoam, 12" Scrapbook Wall Mount
*CraZy TACKz, the patented Tack with a Hook  (link)
*Deco Art: Matte Decou-Page
*DecoArt:  Metallic Lustre:  Black Shimmer, Copper Kettle, Iced Expresso
*Close To My Heart; Cricut "Artiste" Cartridge #Z1790  (link)


Monday, May 12, 2014

Smoothfoam Swivel Block Collage


Smoothfoam is the base for this fun piece of home decor.  It is visually pleasing and boasts some inspiring sentiments. Want to display some photos?  Attach them to the sides or back.  Each block will swivel to reveal a different side.  There are so many fun papers with matching embellishments in the marketplace!  I want to show off the collection in one place and not piece it out.  This is how I did it!


Top three cubes swivel.....


Change up the cube collage by turning the top three cubes.  They swivel by connecting with a skewer or toothpick.


You will need:

Smoothfoam: three 2" x 4" x 4" blocks
Smoothfoam:  one 2" x 4" x 12" block
Coordinated scrapbooking papers, 12" (I used Close To My Heart Ariana papers, to order: X7179B
Coordinated embellishments (I used Close To My Heart Ariana Complements), to order: X7179C
pencil for tracing
Rhinestones, Clear Flourishes - Small, to order: Z1812
Craft Glue or Mod Podge, brush or sponge
Paper trimmer, scissors
3-D adhesive dots
Craft glue
CraZy Tackz - (tack with a hook)
Toothpicks or wooden skewers

1.  Base:  Cut two 4" x 12" rectangles from the scrapbook papers.  Glue to the front and back of the large Smoothfoam block. Cut and glue two 2" x 12" rectangles of contrasting paper to the top and bottom of the block.  Cut and adhere a 2" x 4" rectangle to each side. (For a perfect fit, trace around each block before cutting.)

2.  For each block:  Cut two 4" squares for the front and back.; four 2" x 4" pieces from coordinating papers and adhere.

3.  Smooth out any air bubbles and allow to dry thoroughly.  Trim off any excess paper from the edges and then distress the edges by sponging with ink.

4.  Arrange and adhere the matching die-cuts to each block.  Use 3-D adhesives to add dimension.

5.  To make the blocks swivel, refer to the diagram given and connect the blocks with skewers or toothpicks.  Do not glue.

6.  Glue the TackZ into each side that you would like to hang ephemera, keys, etc.  I like to apply glitter to the stopper of the tackz for added effects.

Hope you are enjoying some beautiful Spring weather!

Until next time,
Live Life with a Flourish!

Marilyn


Hook it up with CraZy TACKz!
www.crazytackz.com


Monday, May 5, 2014

The Passion (Fairies) in my Garden


I have a favorite flower in my garden.  I love them all, but I find this bloom to be inspiring.  The layers in the bloom give it the appearance of a tropical flower.  That is what I thought it was when I first saw one and wondered how it could thrive in the Pacific Northwest.  The only one I have been able to grow, that thrives, is the bloom pictured below.  If you look this flower up online you will read about how the bloom represents the Passion of the Christ and how it came to be.  There are many varieties of this flower and some are really magnificent. The entire plant is an herb.  I loved that fact!  The leaves and bloom can be used in homeopathic medicine and some varieties of the plant bear fruit.


A fairy emerges:  Before the Passion Flower blooms, it is encased in a green pod.  It blooms for three days, then retreats into a dry pod.  I found something fascinating when I opened up the dry pod!  I turned it upside down and pulled the pod leaves back.  What emerged looked like a FAIRY to me!  I was inspired to design several rubber stamp images.  I sent my drawn images to an online business that specializes in making personal stamps.

Inspiration:  Below are the images that I had made into rubber stamps. These are from using the actual rubber stamps and I colored them in with water color pencils.  I didn't know about alcohol pens back in 2008, but I think they would have been fun to use to color these images in.


If you have a Passion Flower and haven't discovered the fairies.....I encourage you to look for one!  Just watch out for the earwigs.  They like them too!

Now click on the blue DCC button at the top of the page and check out what is blooming on the next Blog.
Make sure to take the time to enjoy the little blessings along the way.....

Live Life with a Flourish,

Marilyn


Thursday, May 1, 2014

Kindred Spirits, Unite! An introduction to a very talented lady, SHIRLEY HUDSON!


 French Marie Antoinette Ornaments Star E Pattern - pdf ribbon ornies eiffel tower let them eat cake  tags pin badge party streamer doll. $7.99, via Etsy.


As I was perusing through Pinterest one fine day, I came upon a post that caught my eye.  It was a little tree with pretty paper medallions all over it and appealed to my love of vintage and shabby. ( I also work a lot with paper these days).  I clicked on the link and it took me to an Etsy shop.  Of course I wanted to read a little about the designer, Shirley Hudson, and I found that her story was almost identical to my own!  As I read on, I saw that her birthday was also the same as mine!  Coincidence?  Maaaayyybee......but it was one of those moments that we have every so often in life and made me want to get acquainted with this person!

One more crazy moment for me, was when I was cleaning out  my studio and I ran across a promo paper about the size of a ruler.  It looked new to me and when I read the name on it.....it was Shirley Hudson!  I could not for the life of me remember where I got it or how I came to have it as she lives in a different
state. The Twilight Zone song was playing in my head.......lol.  Come to find out, I had picked it up at the Quilt Market in Portland, OR.  Seems kind of crazy considering it was long after the quilt market that I found her on Pinterest.  If you have had this sort of thing happen, you understand how it makes one wonder about the chain of events and if there might be a purpose for the connections!

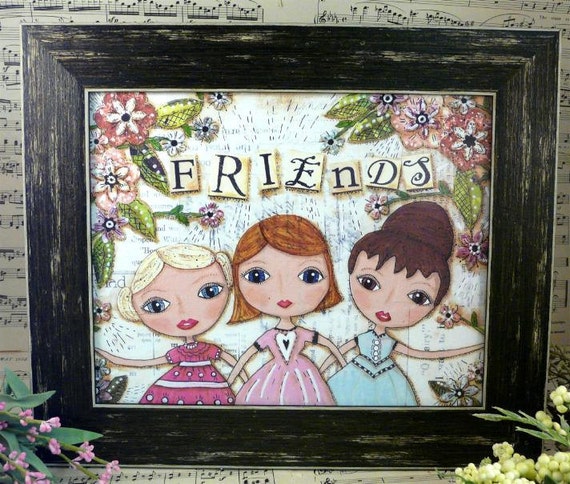
The mixed media print below is one of Shirley's creations.  She has several Etsy shops as she sells stitching patterns, art prints, etc., all with her unique style of a little shabby and Prim.

Girlfriends 3 FRIENDS Print - art  painting paper 8 x 10 mixed media saying garden flowers blonde redhead brunette collage
Shirley's Etsy Shop for this design....

I contacted her, and since then, we keep up with each other on Facebook and e-mail, but we have yet to meet in person.  I am sure that will happen one day!

I want to show off a few other of her talents.  She has a plethora of stitching patterns in her Etsy Shops.
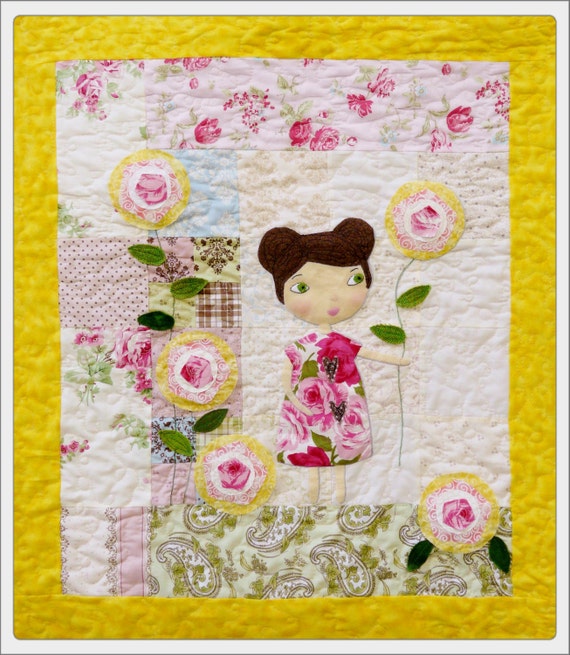
The quilted design below is another of my favorites.  I love the cheerful colors.

She lingers in garden Rose Quilt Pattern pdf - wallhanging big eyes applique free motion embroidery sewing girl pink
To find this pattern here's the link!


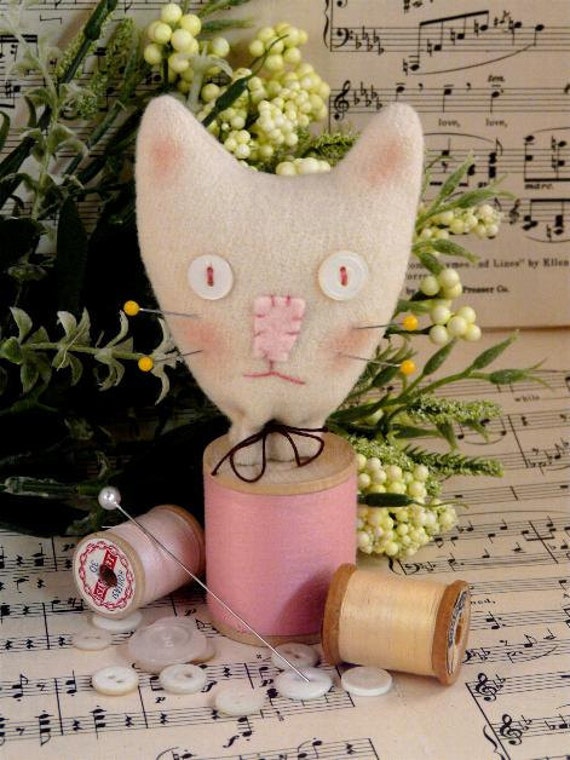
Cat Spool Pincushion PDF Pattern - sewing supply felt wool pin keep doll tabby cushion kitty kitten decor primitive
To find this pattern, here's the link!

Her patterns are easy to create and geared towards the modern, busy woman!

The downloadable PDF'S of her art appeal to a wide variety of tastes, and are perfect for your own home decor or for special gifts.

I have more to tell you about Shirley and I will share some more about how she started her business, why she chose to do what she does, and a little about her family which was a huge part of the reason she does what she does today!  This was the first part of her story that sounded just like mine!

Click on one of the links to visit Shirley's Etsy Shop.  Plan on staying for a while because there is a huge amount of eye candy to look at, and there is a good chance you will find something you can't live without.

Until next time, enjoy this day and celebrate the moments.


Live Life with a Flourish!

Marilyn


P.S.  If you notice that some of the indenting and paragraphs are a little hinky on the blog today....please excuse it, because I do not know why I am not able to fix it!  :-)


Tuesday, April 15, 2014

Scrapbook Layout, Greeting Cards and Bookmarks with Lollydoodle!


APRIL IS THE MONTH FOR LOLLYDOODLE!

Lollydoodle Papers - order #X7183B


"Owls" stamp set perfect with Lollydoodle papers!   Order # B1450


Lollydoodle Complements - Order # X7183C
Spring / Summer 2014 New Products.  Close to My Heart Lollydoodle Complements.  Coordinating Adhesive Sheets.  CTMH Independent Consultant.  CoffeeBreakScrapper


1.  Scrapbook Layout

Lollydoodle papers, Lollydoodle Complements, on Colonial White Cardstock background.


                       2.  Close-up view of lay-out


Card #1


Card #2


Card #3


Card #4


Bookmark & mini bag holder


Bookmark, back view


May, 2014 Creative Hearts Class will feature Timberline papers, X7183B and Timberline Complements, X7182C.  Stay tuned for project previews!


Visit my online shop to order or send me a message!  Have a Lollydoodle Day!

Hugs,

Marilyn

Monday, April 7, 2014

Designer Craft Connection Blog Hop


"April Showers bring May Flowers!"   If you are checking out the designer blogs today, you will see that flowers are blooming early!

Tissue paper, ribbon, paper and foam are some of the craft supplies I have used to create flowers.  Over the years, fads have come and gone, but I love the fact that there are a plethora of ideas and techniques left in their wake that we can implement in today's world of crafting!  There are sooo many tools available to us just a drive away to our favorite craft stores!

In the early days of my design career, I thought that I had to create every single bloom and blossom that went on my designs.  I chose to create ribbon roses for the most part as embellishments.  I realized that no one would know if the ribbon rose was made by me or purchased at the store, so that light bulb moment cut a lot of time off of my "create" time!  Whew!

Having said that, I still love creating flowers and I decided to share some recent (and not so recent) designs that feature handmade flowers.


 The cork board wall decor pictured above is embellished with punched-out flowers that are layered to create a dimensional effect.  Punched out flowers and die-cuts are featured in most of the pictures that are posted below.  The fun part is in layering, and choosing various colors and sizes.


To add more depth, apply some ink to the petal edges using a sponge and inkpad, or/and use dimensional adhesive between the layers.  I like to add a little bling to the center of the bloom.  Rhinestones, pearls, glitter and cabochons work great!


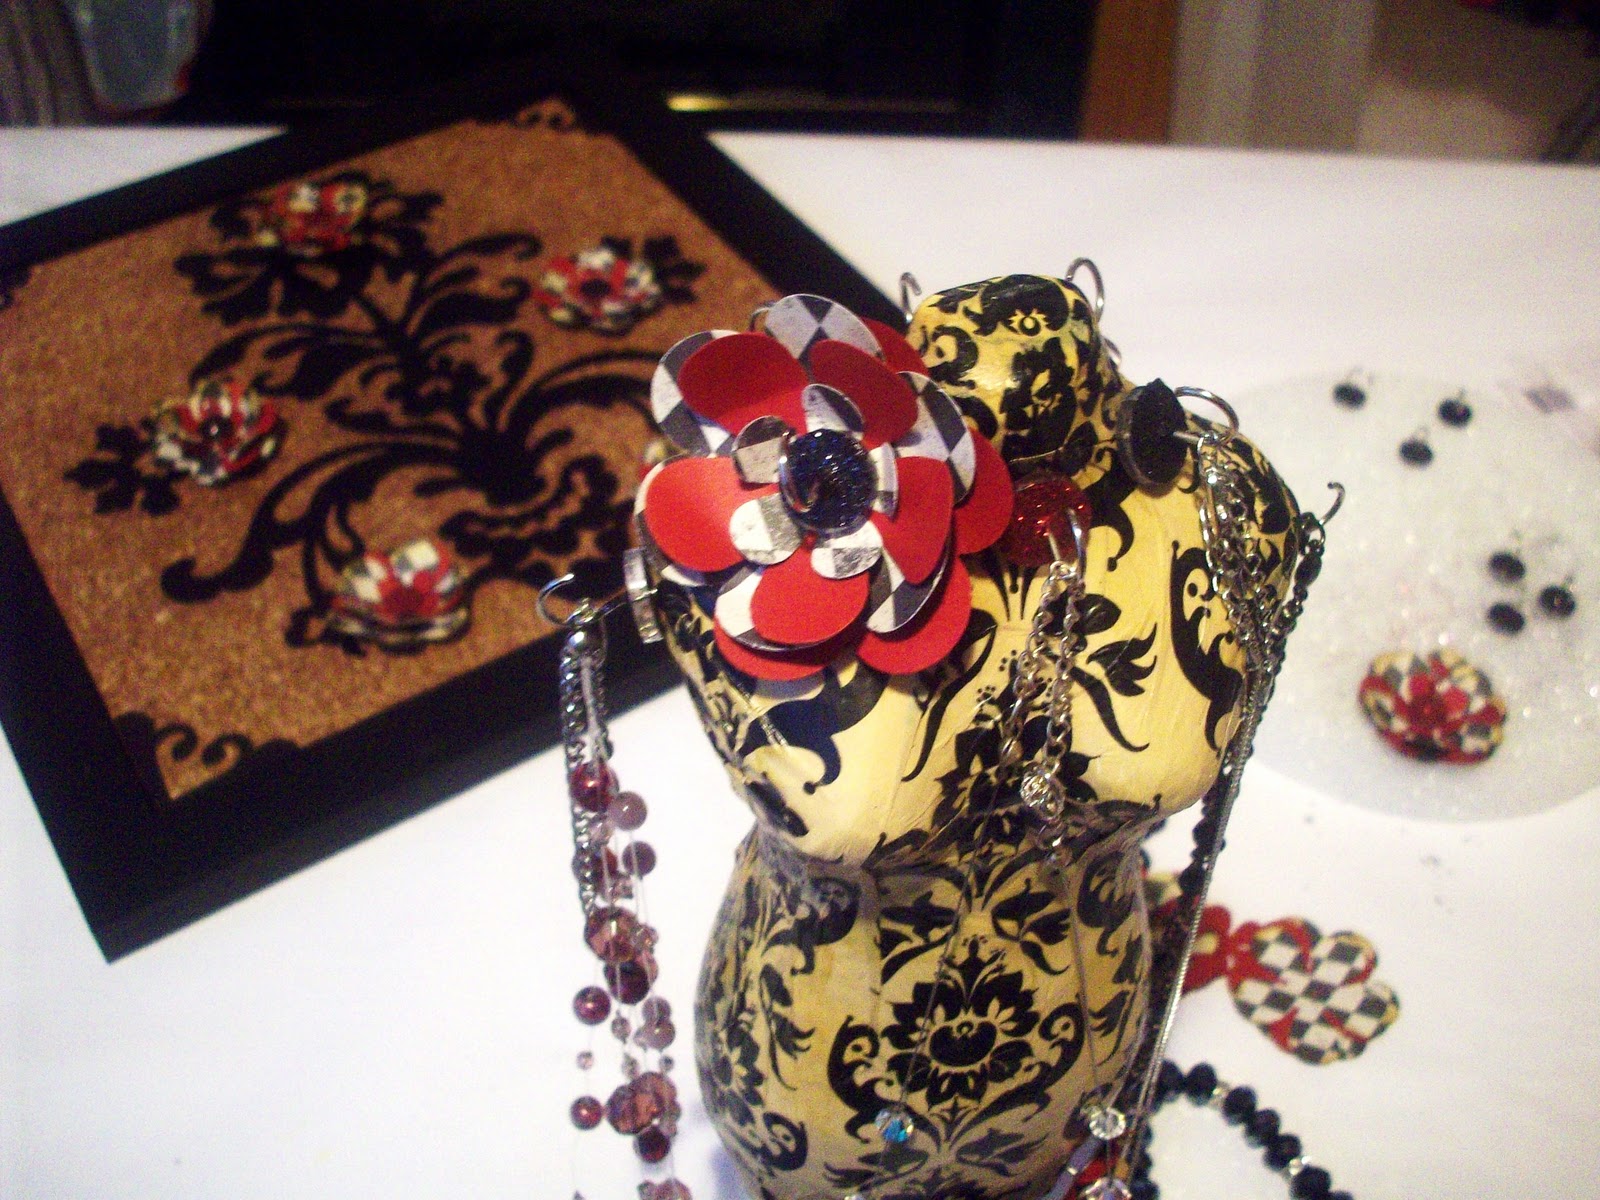
Above are some flowers with an embellished CraZy TACKz in the center.  These can be attached to a bulletin board or put directly into the wall to hang jewelry, belts, etc.


Above is a set created to accommodate jewelry.  The CraZy TACKz were attached to each flower.  Pretty and useful!


More of the same.  Paper blooms and CraZy TACKz.


Ribbon flowers....below.....I used a needle and thread for these.


Below are some flowers made out of chenille stems and felt.  The ribbons are from JoAnn's.  They have CraZy TACKz now too!

I coiled the chenille stem into the shape I wanted.  After gluing to a piece of felt, I cut out around the design, making a complete flower.  These can be used to embellish whatever you like.  The CraZy TACKz were glittered and then glued to each flower to make this into a useful wall hanging.  Jewelry, etc. can be hung on the hooks!


Hope you enjoyed browsing through these flower ideas.  You will find lots more as you travel through the blog hop.  Just click on the blue DCC button to go forward or backward to see what our other designers are highlighting today.


Happy Crafting!

Marilyn

Check out CraZy TACKz at www.crazytackz.com for project instructions and more ideas!


Sunday, March 16, 2014

A Tisket, A Tasket, A Smoothfoam Easter Basket! It is also a Bonnet!


Easter is just around the corner!  Remember dressing up for church and putting on your Sunday best?  My mom used to wear hats to church, especially on special days.  I always looked forward to a new Spring dress and patent leather shoes.  I grew up in the 50's and 60's.  Those days are now considered to be "vintage" to the younger generations.


Smoothfoam has added some half spheres to their line.  Our designers were having fun with them at the CHA Tradeshow, putting them on their heads and dreaming about the glorious head gear they could create. Thus came our Easter Bonnets on Parade Blog Hop!

My daughter Lauren is an aesthetician.  When she was in school, she got a mannequin head.  The mannequin started out as a girl....then after a time got a hair cut and a mustache.  The mannequin is now known as "Marv", and has graced the top of her Christmas tree adorned with all cat decorations.....well, I digress......


Here is a little addition to Marv's bonnet.  A clue of what is to come.  First, let me take you through some steps it took to create this lovely bonnet.


 I gathered the following supplies:

One 6" x 1" thick Smoothfoam disc
One 8" Smoothfoam hollow dome
DecoArt Americana Paints:  Khaki Tan, Olive Green
Paintbrush
Paper flowers, die cut or purchased (1/2" - 1-1/2")
Scalloped die-cut paper circles, 1-3/4"  (paper punch or die-cut machine)
one yard pink Rosette Trim  *Optional
Wooden skewers
Disposable plastic containers, paper plates
Glue gun

Directions:

1.  Paint the inside of the dome Khaki Tan using the skewer for a handle.  Paint the entire disk the same         color.  Let dry.

2.  Paint the outside of the dome Olive Green.  Let dry.


3.  Place a dollop of glue in the middle of the disk.  Center and adhere the bottom of the sphere to the disk.  Push a skewer through both. trim the excess skewer (above the Smoothfoam).


4.  Glue the flowers to the outside, top rim of the sphere.  I adhered three flowers at a time and then filled in the spots that needed it.  The largest flower had a green scalloped circle glued to the back.


5.  Invert the sphere (like a hat), and adhere the scalloped circles all around the sides of the Smoothfoam disk, slightly overlapping the side edges.    Turn upright (like a basket) and adhere the paper flowers around the bottom edges as shown in the photo given.


6.  *Optional: Adhere the rosebud trim to the top of the open sphere.  Adhere around  middle of the scalloped circles (above the paper flowers).


Once this beauty is finished, you will have a bonny bonnet for Easter.  But, Easter is only one day!  There has to be another way to behold this wondrous sight after the Holiday is over!  Surprise!  Turn the hat upside down, add some shreds, eggs, a cute Easter critter, and Voila'!  You have a cute Spring basket!


Can you see that the chick's feathers look a little slicked back?  My cat was licking it when I walked in the room.  Wishful thinking, I guess!  Here she is, looking all innocent.  She is my studio cat and hangs out with me every day.


I hope you have a Happy Easter and enjoy all of the festivities with family and friends!

Happy Day!

Marilyn